- How-to Guides
- Content Management
Webvision Cloud UI Framework
The Webvision Cloud UI Framework provides a fully responsive set of components for delivering websites to all devices and browsers.
Explore the UI Framework
- Customer Data
- Shop
- Technical & Legal
- Webinars
- Recipes
- Home
- How-to Guides
- Content Management
- Customer Data
- Shop
-
Technical & Legal
- Back to parent navigation item
- Technical & Legal
- Integrating 3rd party websites with ADvance
- ADvance authentication options / Single Sign-On (SSO)
- ADvance API
- Webvision Content API v2.0
- Platform cookies
- R&D development roadmap
- Webvision Cloud AWS Hosting
- ADvance Azure Hosting
- 301 redirects
- Modifying Custom Headers on Webvision Cloud
- Webinars
- Recipes
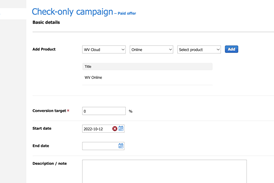
Allow print-only subscribers to access website content by qualifying them for the online product
If an online product is being used to grant access to website articles, the following steps will tell you how you can temporarily open up a qualification of the product to print-only subscribers so that they can access online articles.

Access to the Help Centre user manuals, how-to guides, technical information and legal documents is restricted to Abacus clients.
If you have a Help Centre account, SIGN IN now.
If you are a Webvision or ADvance user and don’t yet have a Help Centre account, you can create one now.
(You must use your company email address for validation.)
Your feedback is important to us!
We would love to hear what you think about what we are doing! Your feedback helps us to better understand what is important to you, and improve our events and services. If you have a few moments, we’d really appreciate your views.
Help Centre SurveyCustomer support
Your Abacus Support contract includes access to our Jira issue tracking platform. Ask the support team questions, or report issues by raising tickets.
Raise a support ticket- © 2026 Abacus
- Cookie policy
- Privacy Policy & Terms of Use
As part of our quality management system, Abacus is committed to improving the services that we provide to our clients and therefore treat customer complaints seriously. Should you wish to make a complaint regarding any of the services we offer, or the level of service you have received, please email us at qualityassurance@abacusemedia.com
Site powered by Webvision Cloud


